
Develop cloud native Kubernetes Java applications on Okteto Cloud
Introduction
In this post, I'll guide you through the process of setting up a Spring Boot Java project for inner loop development on Okteto Cloud's Kubernetes using Eclipse JKube's Kubernetes Maven Plugin. This approach enables efficient development and testing in a remote Kubernetes environment.
Requirements
You will need the following to follow along with this post:
- Java JDK
- Okteto account: You can sign up for free using your GitHub account. Okteto doesn't require a Credit Card to get started, this is my favorite feature of this platform.
- Okteto CLI and Kubernetes credentials: Follow the detailed instructions in the next section.
- Container registry access
Kubernetes Access
To deploy to your development cluster, configure the Kubernetes access credentials as follows.
- Install the Okteto CLI by downloading the latest version for your platform from the GitHub releases page.
- Configure your PATH environment variable to include the downloaded binary.
- Verify the installation:
$ okteto version
okteto version 2.22.2
Next, you'll need to configure the Kubernetes access credentials.
Okteto provides a very simple mechanism for this.
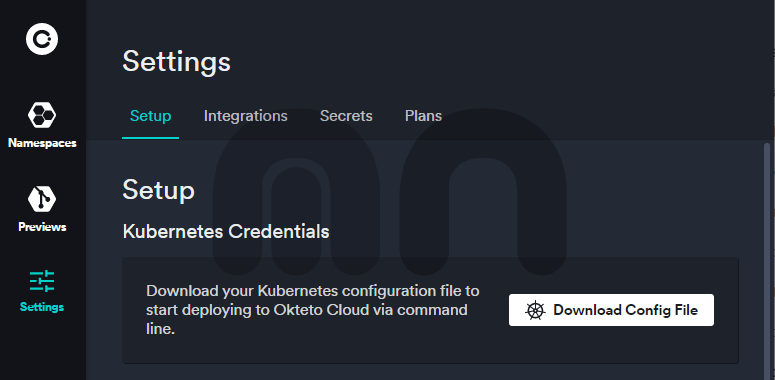
You just need to download the customized .kube/config file,
and set up your current console environment.
If you have logged in to your Okteto account, you can download the file from your dashboard.
Next, you'll need to set up your environment to use the downloaded file:
MacOS/Linux
export KUBECONFIG=$HOME/Downloads/okteto-kube.config:${KUBECONFIG:-$HOME/.kube/config}Windows
$Env:KUBECONFIG=("$HOME\Downloads\okteto-kube.config;$Env:KUBECONFIG;$HOME\.kube\config")Finally, you need to connect the okteto CLI to your cloud context by running:
okteto context use cloud.okteto.comA new browser window will open, and you'll be prompted to log in to your Okteto account or will be automatically redirected in if you are already logged in.
The terminal will output a message similar to:
✓  Context 'cloud.okteto.com' created
✓  Using user @ cloud.okteto.com
Container Registry
Okteto features its own container registry. This allows every Okteto namespace to have a private registry to store its container images. For the inner loop development, it's interesting to leverage this feature.
The easiest way to authenticate without persisting the credentials in the project or the environment is by using the docker cli to log in to the registry.
docker login registry.cloud.okteto.netThe username is the email associated with your Okteto account, or your GitHub username.
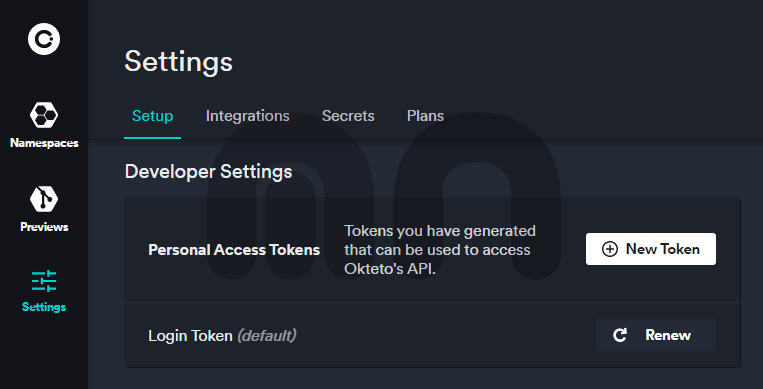
For the password, you'll need to generate an Okteto Personal Access Token. You can generate one from your Okteto Cloud dashboard.
If everything is set up correctly, you should now be logged in and be able to push an image to the registry. Let's continue by setting up the project.
Project setup
Let's now continue by configuring our project to be Okteto friendly.
We'll start by setting up the Kubernetes Maven Plugin that will be in charge of building and deploying our application to the cluster.
Kubernetes Maven Plugin
If your project is not using Kubernetes Maven Plugin, or even if it's already using it, you will need to add the following configuration to the plugin section:
<plugin>
  <groupId>org.eclipse.jkube</groupId>
  <artifactId>kubernetes-maven-plugin</artifactId>
  <version>1.19.0</version>
  <configuration>
    <resources>
      <annotations>
        <service>
          <property>
            <name>dev.okteto.com/auto-ingress</name>
            <value>true</value>
          </property>
        </service>
      </annotations>
      <imagePullPolicy>Always</imagePullPolicy>
    </resources>
  </configuration>
</plugin>
We start by configuring the plugin to use the latest version of JKube.
Next, we add some Okteto-specific configuration to automatically generate the Ingress.
We set this by adding a resources configuration section with an annotation for the service resources.
In this case, we are configuring JKube to automatically add the dev.okteto.com/auto-ingress: true annotation to the service.
Since we are developing for the inner loop, and the project has a -SNAPSHOT version, JKube automatically tags the generated container image with latest.
By adding an Image Pull Policy of Always, we are telling Kubernetes/Okteto to always pull the latest version of the image.
This way, any changes you perform during your iterative development loop, will be reflected in the deployed version of the application.
In addition to the plugin configuration, we'll also need to add some properties to our pom.xml project file:
<properties>
  <jkube.generator.name>
    registry.cloud.okteto.net/your-namespace/jkube-okteto-demo
  </jkube.generator.name>
</properties>
To be able to use Okteto's container registry, we'll need to set up a specific name for our image.
In the project properties,
we need to set an image name for the registry.cloud.okteto.net registry, and our namespace.
In the previous fragment, you need to replace your-namespace with the namespace for your user.
Deploying the application
With your environment set up, you are now ready to deploy the application. Provided that you have set up your environment as specified in Kubernetes Access section, you can now deploy the application by running:
mvn clean package k8s:build k8s:push k8s:resource k8s:applyYour deployment should now be visible from your dashboard:
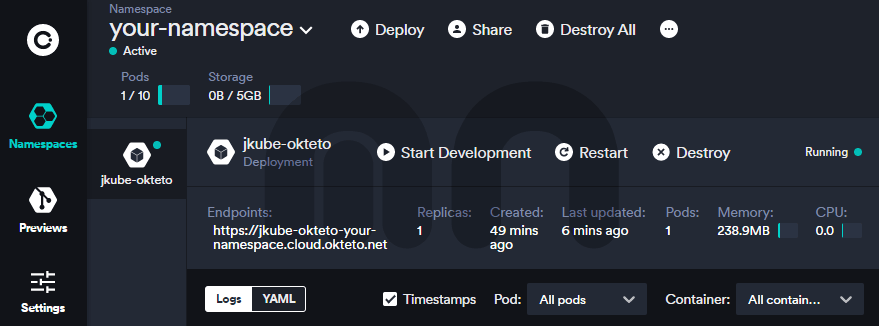
Once the Pod is started, we should be able to cURL the exposed endpoint:
$ curl https://jkube-okteto-your-namespace.cloud.okteto.net/
Hello Okteto!
Since we are using JKube, all the developer specific goals such as debugging (k8s:debug), retrieving the logs (k8s:log), and so on, are available.
Conclusion
In this article, I've shown you how to set up a Java Maven project for inner loop development on Okteto Cloud Kubernetes with Eclipse JKube's Kubernetes Maven Plugin. Developing and testing your cloud native application in a remote cluster is fundamental these days. As you can see, JKube provides a very easy way to make it possible.
You can find the full source code for this post at GitHub.
References
- Okteto Cloud Documentation: Download your Kubernetes credentials
- Okteto Cloud Documentation: Okteto Registry
- Kubernetes Maven Plugin documentation


