
Introducing Goose, the on-machine AI agent
Introduction
In January 2025, Block introduced Goose, an open-source extensible AI agent distributed as a command-line interface (CLI) and Desktop application. Unlike simple code assistants, Goose goes beyond suggestions: it runs shell commands, edits files, executes code, and orchestrates multi-step workflows autonomously. Goose runs locally, connects to different large language model LLM providers, and extends its capabilities through Model Context Protocol (MCP) servers.
Since its initial release, Goose has evolved significantly. The project now supports over 25 LLM providers, including commercial services, cloud platforms, and local models. In December 2025, Block contributed Goose to the Linux Foundation's Agentic AI Foundation (AAIF), alongside Anthropic's MCP and OpenAI's AGENTS.md, ensuring the project's future is shaped by the community under neutral governance.
In this post, I'll guide you through setting up Goose CLI in Linux and macOS, connecting it to Google Gemini, and extending its capabilities using an MCP server.
Setting up Goose CLI
The Goose Command Line Interface (CLI) is a lightweight tool that allows you to interact with Goose directly from your terminal. I prefer using the CLI because it provides a simple and efficient way to interact with the AI model without needing a graphical user interface.
First, download and install the Goose CLI. The getting started guide provides installation instructions for various operating systems.
For Linux, install the latest version of Goose using:
curl -fsSL https://github.com/block/goose/releases/download/stable/download_cli.sh | bashThis script fetches and installs the latest Goose version for your distribution.
Important
Consider verifying the script's source and checksum before execution for security best practices.
Alternatively, visit the GitHub releases page to download the appropriate binary for your operating system.
For macOS users, Goose is also available via Homebrew:
brew install block-goose-cliOnce installed, you can update Goose at any time by running:
goose updateConfiguring the LLM Provider (Google Gemini)
Next, configure Goose to use an LLM provider. Goose now supports over 25 different providers across three main categories:
- API-based providers: Anthropic (Claude), OpenAI, Google Gemini, xAI (Grok), Mistral AI, and more
- Cloud platforms: Amazon Bedrock, GCP Vertex AI, Azure OpenAI, Databricks, Snowflake
- Local providers: Ollama, Ramalama, Docker Model Runner (completely free, runs on your machine)
- CLI pass-through: Claude Code, OpenAI Codex, Cursor Agent, Gemini CLI (uses your existing subscriptions)
For this example, I'll use Gemini API, Google's LLM provider. I chose this option because it offers a free tier with generous rate limits, allowing for experimentation without incurring costs.
This is the fastest way to get started with Goose. However, you may need to switch provider or upgrade to a paid plan if you reach the rate limits.
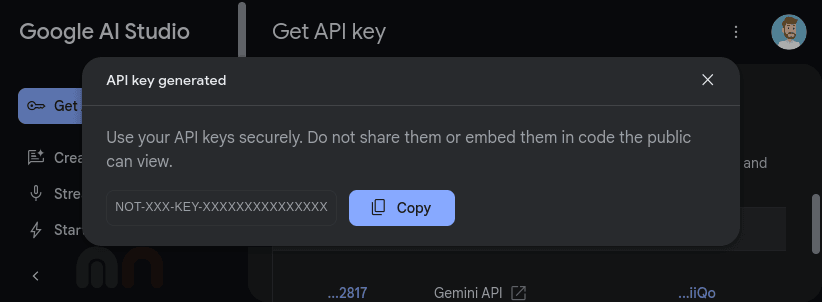
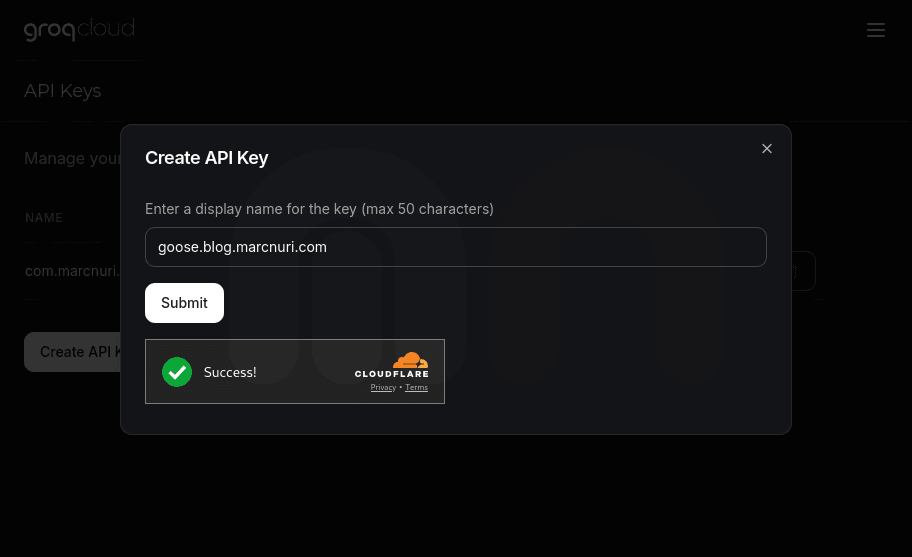
To connect Goose to Gemini, you need to create a Google account and obtain an API key. You can generate this key in the Google AI Studio:
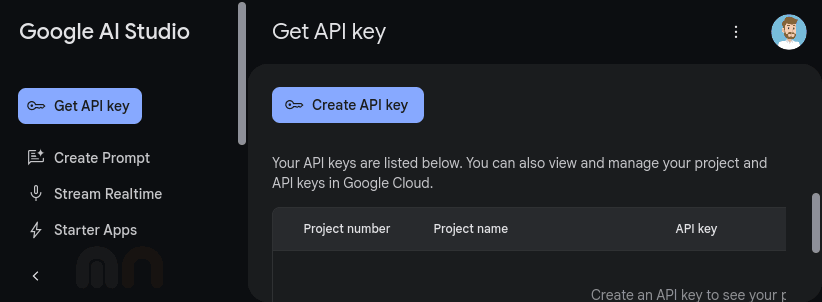
Press on the "Create API Key" button to generate a new API key.
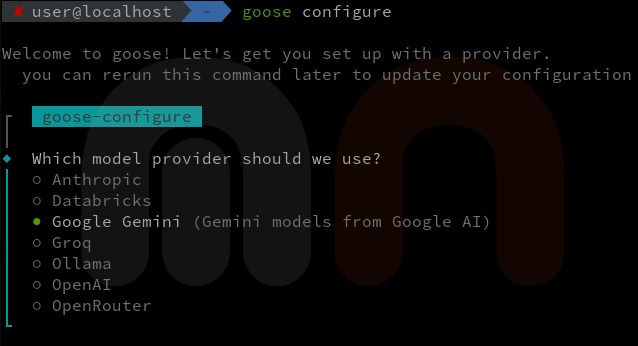
We will use this API key to configure Goose to connect to Google Gemini by setting the Goose provider. You can do this by running the following command:
goose configureThe goose configure command will guide you through setting up the provider, including entering your API key and selecting the default model.
If the configuration is successful, you'll see a confirmation message.
If you encounter issues, check your API key, internet connection, or the logs in your ~/.config/goose directory for more information.
Now that Google Gemini is configured as our LLM provider, let's explore Goose’s capabilities by starting a new chat session.
Running Goose for the first time
Start a new session by running the following command:
goose sessionThis command launches a terminal-based chat session where you can interact with the LLM.
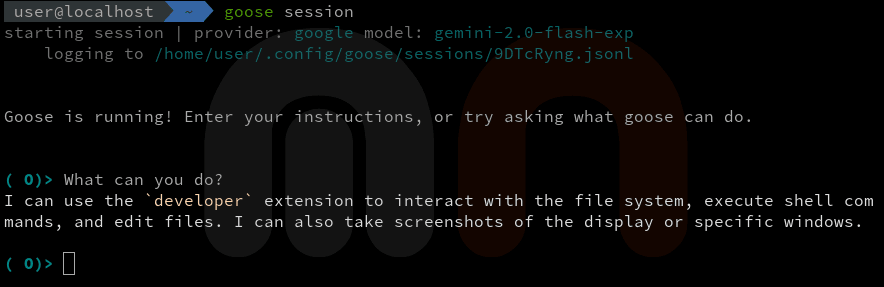
In the image above, you can see the Goose session running in the terminal. In this case, I asked the model to list its capabilities, and it responded with a list of supported commands.
Goose also includes several built-in slash commands that you can use during a session:
/prompts- List available prompts/prompt- Use a specific prompt/compact- Compact the conversation history/clear- Clear the conversation
Setting up Playwright MCP server
The MCP ecosystem has grown significantly since Goose's initial release, with over 3,000 MCP servers now available covering developer tools, productivity suites, and specialized services.
To demonstrate Goose's extensibility, let's set up the Playwright MCP server from Microsoft.
This server enables browser automation using Playwright's accessibility tree, making it fast and LLM-friendly without requiring vision models.
You can configure it through the command line or by editing your goose/config.yaml file.
For this example, we will use the command line:
goose configureThe CLI will prompt:
This will update your existing config file
  if you prefer, you can edit it directly at /home/user/.config/goose/config.yaml

┌   goose-configure
│
◆  What would you like to configure?
│  ○ Configure Providers (Change provider or update credentials)
│  ○ Toggle Extensions
│  ● Add Extension
└
Select Add Extension, choose Command-line Extension, and enter the following details for the Playwright MCP server:
┌   goose-configure
│
◇  What would you like to configure?
│  Add Extension
│
◇  What type of extension would you like to add?
│  Command-line Extension
│
◇  What would you like to call this extension?
│  playwright
│
◇  What command should be run?
│  npx @playwright/mcp@latest
│
◇  Please set the timeout for this tool (in secs):
│  300
│
◇  Enter a description for this extension:
│  Playwright
│
◇  Would you like to add environment variables?
│  No
│
└  Added playwright extension
Once you have added the Playwright MCP server extension, you can start a new session and interact with it through Goose.
Note
To run this extension, you need to have Node.js installed on your system. Playwright will automatically download the required browser binaries on first use.
Using Goose to open a browser and navigate to a website
To demonstrate Goose's capabilities with the Playwright MCP server, we will use it to open a browser and navigate to a website. You can do this by running the following command in the Goose session:
goose sessionOnce the session is running, you can interact with the Playwright MCP server by typing the following command:
Open a new browser window and navigate to https://blog.marcnuri.com, evaluate the links to find the author's LinkedIn, Bluesky, GitHub, and Twitter URLs'Goose opens a browser window, navigates to the website, and analyzes the page's accessibility tree. It then extracts the author's LinkedIn, Bluesky, GitHub, and Twitter URLs and reports them back.
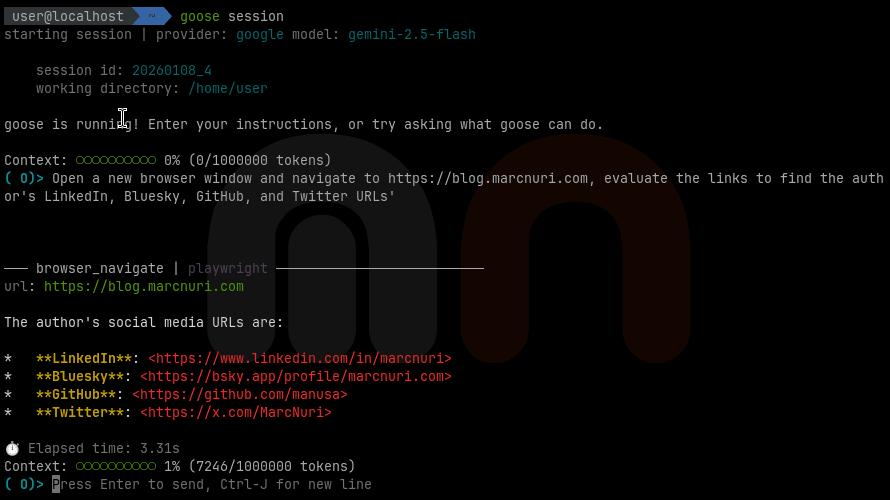
In the previous image, you can see the Goose session with the Playwright MCP server running in the terminal.
After I submitted the prompt, Goose executed these steps:
- Goose sends my prompt and available tools to the LLM.
- The LLM responds with Playwright actions, and Goose executes them:
- Opens a browser window.
- Navigates to the website.
- Scans the page's accessibility snapshot for social media links.
- Goose sends the results back to the LLM for interpretation.
- Goose displays the final answer.
In this case, it interacted with a single MCP server, but you can add multiple servers to further extend Goose's capabilities.
Goose also supports MCP Apps, which enable rich, interactive user interfaces instead of text-only responses. This allows extensions to provide interactive forms, data visualizations, and configuration wizards directly within the Goose session.
Tip
If you're interested in building your own MCP servers, check out the guides for connecting to MCP servers using LangChain4j (Java) or LangChain.js.
Automating workflows with Recipes
Beyond MCP servers, Goose introduces Recipes, a powerful way to package and share reusable AI workflows. A recipe is a YAML file that bundles instructions, required extensions, parameters, and even retry logic into a shareable configuration.
Here's a simple recipe that generates a weekly status report:
version: "1.0.0"
title: Weekly Status Report
description: Generate a summary of work completed this week
instructions: |
  Analyze the git history and open issues to create a brief status report.
  Focus on commits from the past 7 days.
extensions:
  - developer
activities:
  - What did I accomplish this week?
  - Summarize my commits since Monday
Run a recipe from the CLI:
goose run --recipe weekly-report.yamlRecipes can include parameters for dynamic input, retry logic for automated validation, and sub-recipes for composing complex workflows. You can also schedule recipes to run automatically using cron expressions:
goose schedule add --schedule-id daily-report --cron "0 9 * * *" --recipe-source ./recipes/daily-report.yamlThe Goose community has built an OSS Skills Marketplace where you can discover and share recipes and extensions. This makes it easy to bootstrap common workflows without starting from scratch.
Using an alternative LLM provider (Groq)
One of my favorite features of Goose is its ability to connect to different LLM providers. So far we've used Google Gemini because it can be accessed for free, but you may want to switch to a different provider for various reasons.
Tip
If you prefer to keep everything local and free, consider using Ollama with Goose.
Simply install Ollama, run a small language model like ollama run qwen2.5, and configure Goose to use it.
This gives you complete privacy and no rate limits, though it requires a capable machine.
With MCP, even smaller models can achieve expert-level performance on specialized tasks.
Let's try connecting to Groq, a powerful LLM provider that offers a wide range of models and capabilities and is known for its speed and efficiency. Groq's unique Language Processing Unit (LPU) architecture delivers high throughput while consuming minimal power, making it ideal for real-time AI tasks.
Groq offers a free tier too, but its token-per-minute rate limit might be too restrictive for some use cases. This is especially true for MCP servers that require continuous interaction with the LLM provider.
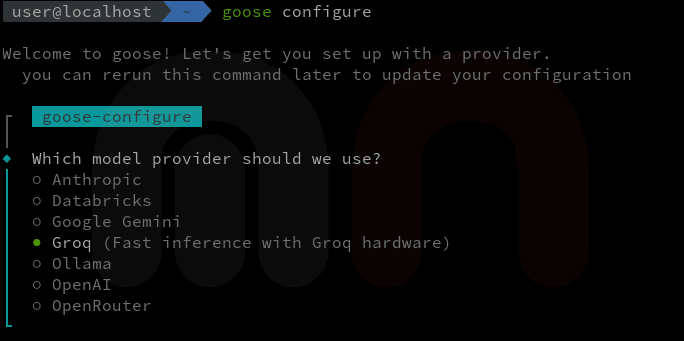
To connect Goose to Groq, you need to create an account on the Groq website and obtain an API key. You can generate this key in the Groq cloud console:
We will use this API key to configure Goose to connect to Groq by setting the Goose provider. You can do this by running the following command:
goose configureThe goose configure command will guide you through setting up the provider, including entering your API key and selecting the default model.
With just a simple command, you can switch between different LLM providers and explore their capabilities with Goose. It's now very easy to use a variety of AI models and services leveraging their specific strengths without having to switch between different tools or interfaces.
Note
For a practical example of using Groq with Goose, see how to run DeepSeek-R1 with Goose using Groq as a provider.
Goose vs Claude Code vs Cursor
With so many AI coding agents available, you might wonder how Goose compares to commercial alternatives like Claude Code and Cursor.
| Feature | Goose | Claude Code | Cursor |
|---|---|---|---|
| Pricing | Free (open source) | $20-200/month | $20-200/month |
| Model flexibility | Any LLM (25+ providers) | Claude models only | Curated selection |
| Runs locally | Yes | No (cloud) | Partial |
| MCP support | Native | Yes | Limited |
| Recipes/workflows | Yes (YAML-based) | No | No |
| IDE integration | CLI + Desktop | CLI | Full IDE |
| Open source | Yes (Apache 2.0) | No | No |
When to choose Goose: You want a free, fully open-source agent with complete model flexibility, workflow automation via Recipes, and no vendor lock-in.
When to choose Claude Code: You prefer a polished, ready-to-use experience with Anthropic's powerful Claude models and don't mind the subscription cost.
When to choose Cursor: You want deep IDE integration with AI-powered autocomplete and inline suggestions rather than a standalone agent.
Note that Goose also ships as a native Agent Client Protocol (ACP) agent, so you can drive it from editors like Zed and JetBrains AI Assistant — narrowing the IDE-integration gap without giving up its open-source, model-agnostic core.
Frequently asked questions
Is Goose completely free?
Yes. Goose is open source under the Apache 2.0 license with no subscription fees. However, you'll need access to an LLM provider. You can use a free tier (Google Gemini, Groq), a paid API, or run models locally with Ollama for a completely free setup.
What's the difference between Goose and Claude Code?
Goose is model-agnostic and runs locally, while Claude Code is tied to Anthropic's models and runs in the cloud. Goose also offers Recipes for workflow automation and supports 25+ LLM providers. Claude Code provides a more polished out-of-the-box experience but costs $20-200/month.
Can I use Goose offline?
Yes, by pairing Goose with a local LLM provider like Ollama or Docker Model Runner. This gives you complete privacy and no rate limits.
What are MCP servers and do I need them?
MCP (Model Context Protocol) servers extend Goose's capabilities by connecting it to external tools and services. They're optional but powerful. You can add capabilities like browser automation, GitHub integration, or Kubernetes management without writing custom code.
Conclusion
In this post, I introduced Goose, an open-source AI agent that runs locally, connects to 25+ LLM providers including Google Gemini and Groq, and extends its capabilities via MCP servers and Recipes. I demonstrated how to set up Goose, configure Google Gemini, use Playwright MCP for browser automation, and automate workflows with Recipes.
Since its January 2025 release, Goose has matured significantly. The project has seen over 110 releases, gained 30,000+ GitHub stars, and attracted 350+ contributors. The MCP ecosystem has expanded to over 3,000 servers covering developer tools (GitHub, VS Code, Docker), productivity suites (Google Drive, Asana, Slack), and specialized services like the Kubernetes MCP Server.
A major milestone came in December 2025 when Block contributed Goose to the Linux Foundation's Agentic AI Foundation, alongside Anthropic's MCP and OpenAI's AGENTS.md. This ensures that Goose's development continues under neutral, community-driven governance with backing from AWS, Anthropic, Google, Microsoft, OpenAI, and other industry leaders.
As the agentic AI ecosystem continues to evolve, Goose stands as a solid foundation for developers looking to automate AI-powered workflows while maintaining full control over their local environment. This shift towards machine-based developers is reshaping how we think about developer tools and workflows.
Tip
For insights on how CLI agents like Goose can dramatically improve developer productivity, see how I boosted productivity with AI in 2025.


