Windows 11: How to enable the built-in Administrator account
There are several approaches to enable the built-in Administrator account in Windows 11.
In this article, I'll show you the way that I find most easy and that I've been using for years in earlier versions of Windows too.
Opening the Command Prompt
The first step is to start a Windows Command Prompt as an administrator user.
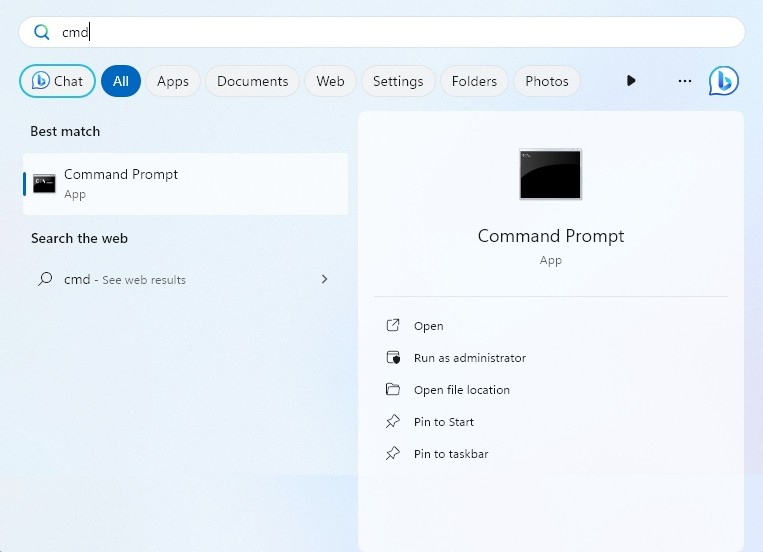
We'll start by pressing the start button and typing cmd.
The start menu should look like the following picture:

Once the Command Prompt application is listed, click on the Run as administrator option.
Note
You might be prompted by the User Access Control (UAC) to continue. Click on Yes to proceed.
Enabling the Administrator account
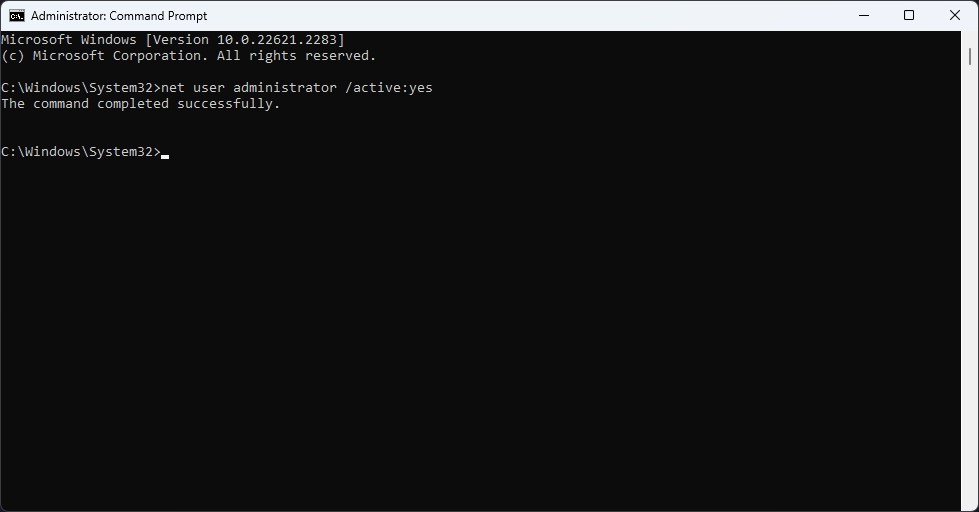
Once the Command Prompt is open, we'll run the following command to enable the built-in Administrator account:
net user administrator /active:yesThe following screenshot shows the successful output of the command:

Logging in as the Administrator
Once the Administrator account is enabled, you can log in as the Administrator.
Your login screen should contain the new entry for the Administrator account:

The user shouldn't have a password set yet.
Once you've logged in, you should set the password by pressing Ctrl+Alt+Del and selecting the Change a password option.
